The ladies on fibre art had the wonderful opportunity to learn the art of millinery. Under the instruction of the very talented Jamie Mc Eleney they took part in one-day workshop on the 14th of January. It was a very constructive day that gave a focused crash course on the basics of millinery, showing them how to make fascinators and sinamay hats.
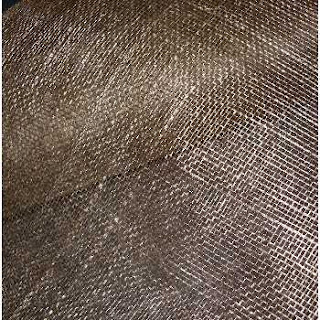
The girls saw the introduction of a new fabric called sinamay which they worked with for the entire day. This is a fabric traditionally used for hat making due to its manipulative properties. Sinamay comes from the abaca plant which is then woven to give a gaped straw fabric. A photo of which can be seen below.
The fabric is first wettened which loosens the fibres so that it can be manipulated and moulded. There is natural glue within sinamay that means that when the wet reshaped fabric is then dried it regains its stiffness. When it is used for millinery purposes the sinamay is sculpted over a head. This process was taught t the ladies by Jamie and can be seen step by step below.
Here we can see Jamie pin a wet piece of 10” by 10” sinamay to a polystyrene head. The fabric was pulled and stretched over the head without over-warping and distressing the fabric too much.
He then placed another piece of wet sinamay in the opposite direction stretching and pinning it into place.
The layered sinamay was then pinned in an oval shape, which can be seen below.
Once the pins were secured he then dried the fabric using a hairdryer.
Once the sinamay was dry and stiff he cut around the oval shape and hemmed it with bias-binding.
Bias binding is a strip of fabric that has been cut on the bias and folded. It is ideal for hemming hats due to its natural bend. However it is also used for decoration in millinery.
Jamie also showed the girls how to make their own bias binding. To make a standard sized bias binding he cut a 2” strip of sinamay on the bias. He then folded edges in towards the centre so that the two edges met. This can be seen in the photo below.
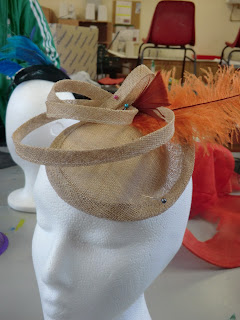
The strip was then folded along the centre line and the binding was complete. This binding has a finished edge and carries a lot of structure and bounce. Therefore it is ideal to create some ‘drama’ in a hat or fascinator. Examples of Jamie’s use of bias binding as decoration can be seen in the following photographs.
An enjoyable day was had by all and it is fair to say that a lot was learned.
They only need someone to get married now so that they can show off they’re talented work!


Excellent post, Emma - great way to combine photos with text, very easy to follow, and interesting (I resisted the impulse to say fascinating....well, not quite!)
ReplyDelete